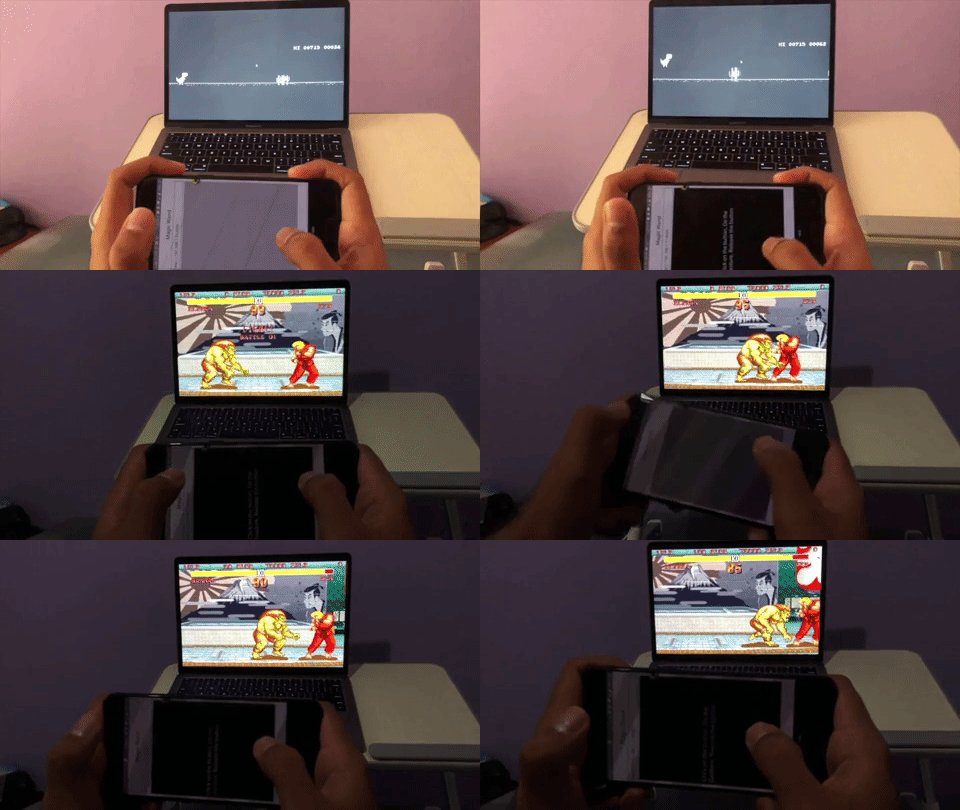
Control your computer with your hand gestures!
For one of the projects in my master’s course, we were supposed to build an intelligent system that utilised any type of sensor data. Me and my group decided to do something cool. At first, we weren’t sure if we could pull something like this in a short time, but voila! Here’s what we finally built!

The demo that you see above recognizes the hand gesture when pressing the button and then classifes different gestures and maps it to keyboard presses.
Cool, right? Now, let’s see the steps involved in making this project.
- A mobile app to capture accelerometer and gyroscope values to send to the computer.
- A local server running on the machine to receive the sensor values from the phone.
- A Python script that uses a machine learning model to classify the sensor values and map it to different operations on the computer.
The Mobile App
I’ve always been exploring web development, but this was a good opportunity for me to delve into mobile app development. We chose to build the app with React Native since it can be ported it to both Android and iOS.
It was quite simple to get started with React Native (especially with Expo) and there was enough documentation to easily access accelerometer and gyroscope values through the ‘expo-sensors’ API.
The source code and .apk file can be found in the git repo
The local server
The App was now ready to send the sensor values to any server, but we need to set up a server to receive and store the values on the computer we want to control. For this app, we set up a simple node express server that only stores the latest gesture sensor value.
The server we made exposes 3 endpoints - \
/getNewAction (GET) - This helps get the latest stored gesture sensor values.\
alive (GET) - returns true if the server is up and running. The Mobile App sends a request to this endpoint after we’ve enter the server address to checks if it’s alive or not.\
/ (POST) - Root endpoint. This is where the mobile app send the sensor values and this endpoint helps to store the latest value, which can later be accessed by the /getNewAction endpoint.
Now that we’ve sent the sensor values to the computer, we are ready to classify the sensor values and map it to keyboard actions!
The Python Script
The python script continually sends GET requests to /getNewAction endpoint in the local server. When there is a new gesture sent from the phone, it get’s the values, otherwise the endpoint returns false.
The python script gets the new sensor values in a json format. This is then converted into a data frame with the following columns -
"ax", "ay", "az", "gx", "gy", “gz"
ax, ay, az - corresponds to x,y,z coordinates of accelerometer values.
gx, gy, gz - corresponds to x,y,z coordinates of gyroscope values.
The data is now ready to be passed on to the machine model to classify!
The Machine Learning Model
After receiving the new gesture sensor values, we derive new features from the 6 features we currently have. To be precise, we derive 36 new features from the sensor data. The following is the code which helps do this -
def dataPrep(gestureData):

    temp = gestureData
    acc_x_mean,acc_y_mean,acc_z_mean,gyro_x_mean,gyro_y_mean,gyro_z_mean = temp.mean()
    acc_x_max, acc_y_max, acc_z_max, gyro_x_max,gyro_y_max, gyro_z_max= temp.max()
    acc_x_min,acc_y_min,acc_z_min,gyro_x_min,gyro_y_min,gyro_z_min = temp.min()
    acc_x_mad, acc_y_mad,acc_z_mad, gyro_x_mad, gyro_y_mad, gyro_z_mad = temp.mad()
    acc_x_std,acc_y_std,acc_z_std,gyro_x_std,gyro_y_std,gyro_z_std = temp.std()

    acc_x_y_corr,_ = pearsonr(temp.ax,temp.ay)
    acc_z_x_corr,_= pearsonr(temp.az,temp.ax)
    acc_y_z_corr,_ =pearsonr(temp.ay,temp.az)

    gyro_x_y_corr,_  =pearsonr(temp.gx,temp.gy)
    gyro_z_x_corr,_ =pearsonr(temp.gz,temp.gx)
    gyro_y_z_corr,_ =pearsonr(temp.gy,temp.gz)
mean, max, min, mad (median absolute deviation) and correlation values are derived for each row, converted into a list and fed into the model for the classification.
Model Architecture
The model architecture involves a simple neural network model with the following sequence -
model = Sequential()
model.add(Dense(64, activation='relu', input_dim=36))
model.add(Dropout(0.5))
model.add(Dense(64, activation='relu'))
model.add(Dropout(0.5))
model.add(Dense(2, activation='sigmoid'))
The whole code can be found in the Model Training folder.
Mapping to keyboard keys
After we fit our new incoming data into the above trained model, it helps us classify it. In our project, it can classify into 2 actions - 0 and 1. That is, a forward tilt of the smartphone maps to 0 and the right tilt maps to 1. We can then map each of these values to to any keyboard action in the following manner in Python -
if result == 0:
    keyboard.press(Key.right)
    time.sleep(0.1)
    keyboard.release(Key.right)
if result == 1:
    keyboard.press(Key.left)
    time.sleep(0.1)
    keyboard.release(Key.left)
Improvements
-
Make use of websockets instead of HTTP GET’s to observe if any new gesture has been performed by the python script. The current way works, but is quite inefficient and sometimes the environment it runs can set a maximum request limit so it can time out. So it’s safe to say we can use the current implementation only for a short demonstration., but using web sockets is the better way.
-
The current system maps only 2 gestures. We could add train for more gesture actions so that we can make it to more keyboard keys.
Links
The inspiration for building this is from one of the coolest developer I follow on twitter @devdevcharlie and she wrote a blog post on how to play streetfighter with body movements using an Arduino! Do check it out :)
The follwing Git repo has a detailed user guide as to how to set it this project in your system -
Other Links -
